Living Roof
The living roof is what makes the BioDome truly fire-resistant and thermally regulated. A layer of growing plants and soil on top of the roof structure absorbs heat, holds moisture, and blends the structure into the landscape.
-
Sheathing
Cork board or dense wood fiber board over purlins.
-
Waterproofing
EPDM pond liner (1mm minimum) fully lapped and sealed.
-
Root Barrier
Drainage mat + filter fabric to prevent roots from penetrating the waterproof membrane.
-
Growing Medium
10-15cm lightweight substrate (pumice/perlite/compost mix).
-
Planting
Sedums, native succulents, drought-tolerant groundcovers.


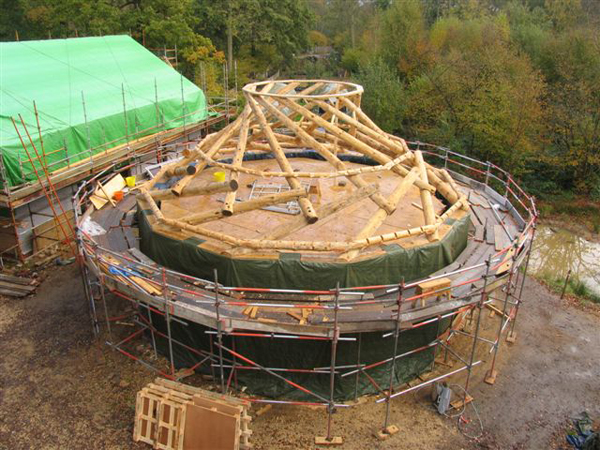
Central Opening Waterproofing
Section titled “Central Opening Waterproofing”The ~1m diameter central opening is the lowest point of the dome apex. Without proper detailing, water from the living roof drains toward this opening.
- Raised curb: Install a 150mm high curb around the opening using cork or treated timber. EPDM membrane wraps up and over this curb.
- Metal flashing collar: A pre-formed aluminum or stainless steel collar (1.2m outer diameter) sits atop the curb with a 45° drip lip directing water outward.
- Drainage relief: Cut 4 small notches (25mm wide × 10mm deep) in the curb at cardinal points to allow trapped water to escape to the main roof drainage layer.
- Skylight or cap: The opening should be sealed with a glazed dome, operable hatch, or removable weatherproof cap. Do not leave open to weather.
Roof Overflow Protection
Section titled “Roof Overflow Protection”Living roofs can retain significant water during intense winter storms. If the drainage mat capacity is exceeded, water must have an escape path.
- Overflow scuppers: Install 2-4 overflow outlets (75mm diameter PVC pipe through EPDM, sealed with rubber boot) at the low points of the roof perimeter.
- Outlet height: Set scupper inlet 50mm above normal drainage layer level — water only exits when drainage is overwhelmed.
- Discharge: Direct overflow away from foundation via splash blocks or gravel drainage strip.